Translation

Wealty is a powerful Real Estate WordPress theme that adapts to your needs. With a stunning design and easy-to-use features, you can quickly take your business to the next level without any coding knowledge.

Please check our FAQ, most probably there is already an answer to your question. If you didn’t find what you need, please contact us at support@codefactory47.com

Wealty theme comes translation-ready. Instead of making you create a file containing the human-readable text from a particular theme, we’ve included that file with the theme itself. All that’s left is performing the actual translation, which is where you (or a professional translator) come(s) in.

We’re about to show you how to translate our themes. But first, let’s examine the three types of files involved in the translation process: .pot.po, and .mo.

Files that enable translation

Here’s a quick rundown of the three file types and what they contain:

  1. .pot: This file is a “portable object template” that contains all of the text to be translated. Since it’s just a template, it serves as the basis for your translation. It doesn’t contain the translations themselves.
  2. .po: The “portable object” file contains the original text and the translations. It’s the file we’re about to show you how to edit.
  3. .mo: This is the “machine object file.” When your translation is complete, you will convert or export your .po file to this file type so that WordPress can use it.

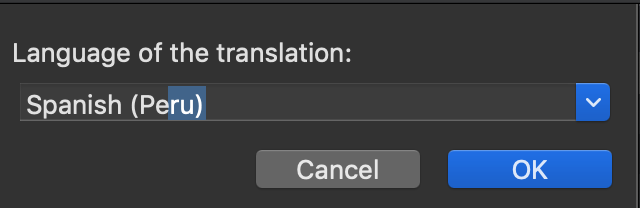
Now let’s go over how to translate Wealty WordPress theme to another language. We’ll show you how to translate the theme to Spanish – Peruvian Spanish, to be precise!

Translating theme

Wealty theme comes with a .pot file. If you’re not translating one of our themes and you need to generate a .pot file for a different theme, refer to this example in the WordPress Codex. Let’s get started by downloading a free translations editor.

1. Download and open Poedit

There are several translations editors out there, some of which we’ll consider toward the end of this article. Poedit has been around for several years and is a favorite among developers and translators in the WordPress community. It’s also free to use, which eliminates a major barrier to entry for first-time translators.

Go ahead and download Poedit now. When the download completes, unzip the file and open the application. You will see this screen:

2. Open your theme’s .pot file in Poedit

Click the “Create new translation” option in Poedit.

Browse your hard drive for a local copy of the .pot file for your theme. You should be able to find it in the folder titled “languages” within the theme folder (wp-content/themes/wealty/languages/wealty.pot)

If you didn’t save a local copy of your theme, don’t worry! You can download it from "Downloads" page on ThemeForest.

3. Select a language

Poedit saves your translation according to the language and an associated country (for localization). Just begin typing the language and Poedit will fill it in for you (Screenshot ). After you’ve entered the language, open a set of parentheses and enter the name of the country.

The resulting .po file will be titled according to abbreviations for the language and associated country. In our case, we’re using Peruvian Spanish, so our file will be es_PE.po. A Uruguayan Spanish translation would be es_UY.po, and a Vietnamese translation would end up being vi_VN.po. Makes sense, right?

Translation language must be same that you selected in your WordPress dashboard in Settings > General > Language. Let's say in dashboard is selected French (Canada). In this case language abbreviation for translation file will be fr_CA.po. For Portuguese (Brasil) abbreviation will be pt_BR.po, etc..

4. Perform the translations

Here’s where your language skills come in! Go through every line of human-readable text in theme and translate it to the target language. Remember, the .pot file has already compiled everything you need to translate. That’s how those lines of text got there.

Just highlight each line one by one and enter the translation in the box in the bottom left corner of the Poedit interface.

If you do not need to translate all the words, you can use search in Poedit (Control+F or Command+F on the Mac) to find one you need.

5. Save translations in .po and .mo

When you save your new .po file from Poedit, the application automatically generates an additional .mo file and saves it in the same directory on your hard drive.

After saving the files to your hard drive, add the wealty prefix to them:

es_PE.po becomes wealty-es_PE.po

es_PE.mo becomes wealty-es_PE.mo

After renaming the files, use an FTP client to upload both files to the wp-content/languages/themes folder in your website's directory.

Note: If languages folder is missing in wp-content directory, create this folder manually!

That's it! Right after uploading files translation is applied.

Translating WordPress themes is a multifaceted topic. Here, we’ve focused exclusively on how people using Wealty theme can translate theme to any language using a popular translations application.

After translating URL parts (slugs), the WordPress permalink cache should be dropped. The simplest way is to go to Settings > Permalinks, select "Postname" structure and click on "Save".

To create multilingual website you need to use WPML plugin. It is 100% compatible with the theme.
Unfortunately, WPML authors do not permit to provide their plugin for free within themes. Plugin license should be purchased directly on their website.